If you have seen much of my blog, you’ll know that I love essential oils. One of the main ones that got me hooked was lavender. Not only did it help us with our seasonal allergies, it is also known as the swiss army knife of essential oils. Any time we have a bite, wound, or burn, we reach for the lavender. It is great for the skin and is also widely known to be a calming scent. We use it in our diffuser every. single. night. It is also one of the main essential oils we use in the Aroma Freedom Technique. You can read more about that here.
As you can see, lavender has quite the roll in my family. We always have it on hand ready to use. And after being to the lavender farm in Mona, let me tell ya, it’s quite the site to see and it smells amazing!
Coffee
If you’re walking this same journey of homemaking, decluttering, and creating a peaceful, faith-filled home, you’re not alone.
I’d love to share encouragement, simple living inspiration, and homestead wisdom with you — right to your inbox.
You may have noticed that I use essential oils in a lot of my recipes, tips, and daily life. How did I choose which essential oils to use? Why did I choose this brand? I’m glad you asked!
Before deciding on which brand to use I had dabbled with various brands, never quite achieving the desired results. After being introduced to Young Living, I saw almost immediate results for one thing after another. During the first month alone the 11 (at the time) essential oils that came in my premium starter kit had helped over 20 different things we had been dealing with. I was not only amazed, but I realized right then and there that this was the best of the best!
Top 5 reasons I love Young Living
Here are the top 5 reasons I truly believe Young Living is the best of the best:
1. Young Living is the only essential oil company that owns their own farms or partners with other farms who also live up to their standards for growing, harvesting and distilling.
2. Young Living has a Seed to Seal program, which allows them to deliver pure, authentic essential oils and essential oil-infused products that you and your family can use with full peace of mind. There are three pillars in seed to seal, Sourcing, Science, and Standards. Read more about it here.
3. Anyone can visit the Young Living farms around the globe and participate in the harvest & distillation process. This is an amazing experience! No other essential oil company owns their own farms and can offer this opportunity.
4. There are no minimum sales or purchase requirements for Young Living members. Ever. The only thing you have to do to keep your membership active is to place $50 in orders per year. I have never been a part of another company like this who did not require a monthly purchase.
5. Last but not least, our team offers amazing support! We offer a reference guide (with tips on how to use it), educational classes, and an exclusive facebook group that offers lots of support and community. Join our team here!
If you’re walking this same journey of homemaking, decluttering, and creating a peaceful, faith-filled home, you’re not alone.
I’d love to share encouragement, simple living inspiration, and homestead wisdom with you — right to your inbox.
If you’re walking this same journey of homemaking, decluttering, and creating a peaceful, faith-filled home, you’re not alone.
I’d love to share encouragement, simple living inspiration, and homestead wisdom with you — right to your inbox.
Kyleigha had a bit of a rough start in life, you can read a little more about it here. When she was in kindergarten, it wasn’t uncommon for me to get a phone call saying she wasn’t feeling well or that she had a high temperature. We were constantly going to the doctor and trying to figure things out. I finally got them to refer us to Children’s Hospital to see a specialist. At the age of 5 she was diagnosed with Hyperoxaluria. Not only was this a huge word I had never even heard before, it was also something that not many people even knew about. The doctor (who was amazing!) felt we could handle things by watching her diet instead of using medication so she sent us to a dietician. This was huge for us! So, off to the dietician we went. Guess what? Even she couldn’t help us. Yep, that’s right. She didn’t know enough about it and was basically no help at all.
Once again, this momma bear had to take matters into her own hands. It was time to do some more research.
What exactly Hyperoxaluria is…
According to Wikepedia, Hyperoxaluria is an excessive urinary excretion of oxalate. Individuals with hyperoxaluria often have calcium oxalate kidney stones.
The short of it is this: have a low sodium, low oxalate diet to help prevent kidney stones from forming.
We don’t know if Kyleigha ever had kidney stones. What we do know is that she often had blood in her urine and had “tummy” aches. Either way, because of this condition, we had to watch her diet. We were told that she should have no more than 140mg of sodium per serving. Now, if you have ever read labels on the shelf, you know that this is near impossible to do.
Grocery shopping and meal planning just got hard
I had to fight back the tears every time I shopped. How was I supposed to take on these new dietary needs when no-one could help me?
Foods high in oxalate
What exactly are foods high in oxalate?
These are foods such as: (if you do a quick search you are bound to see a few variances)
- Beans
- Beer
- Beets
- Berries
- Chocolate
- Cocoa Powder
- Coffee
- Cranberries
- Dark green vegetables, such as spinach
- Nuts
- Okra
- Oranges
- Rhubarb
- Soda (cola)
- Soy beans
- Soy milk
- Spinach
- Sweet potatoes
- Tea (black)
- Tofu
- Wheat bran
How we do low-sodium
We have also found that when we use pink himalayan salt, it doesn’t affect her as badly. It has a lower sodium content than regular table salt. Table salt may have about 2300 mg of sodium per tsp, sea salt has about 2000 mg of sodium per tsp, while pink himalayan salt has only about 1700 mg per tsp. That’s a pretty big difference when you are on a low-sodium diet!
Learning to do it on her own
By the time Kyleigha was 8 years old, she had already been on her special diet for 3 years so I decided to hand over some of the responsibilities to her. If this was something she was going to be dealing with her whole life, I wanted her to know how to read and understand her body.
If you’re walking this same journey of homemaking, decluttering, and creating a peaceful, faith-filled home, you’re not alone.
I’d love to share encouragement, simple living inspiration, and homestead wisdom with you — right to your inbox.
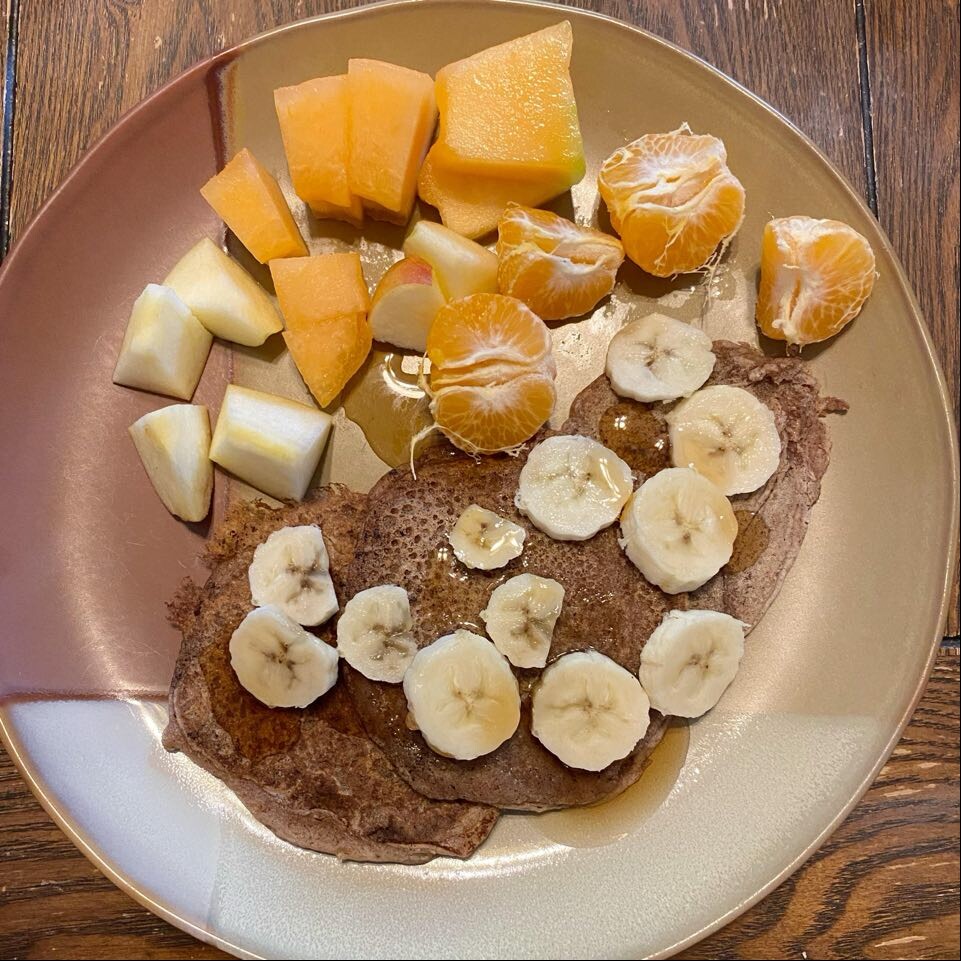
Gluten-Free Pancakes (no egg, no dairy)
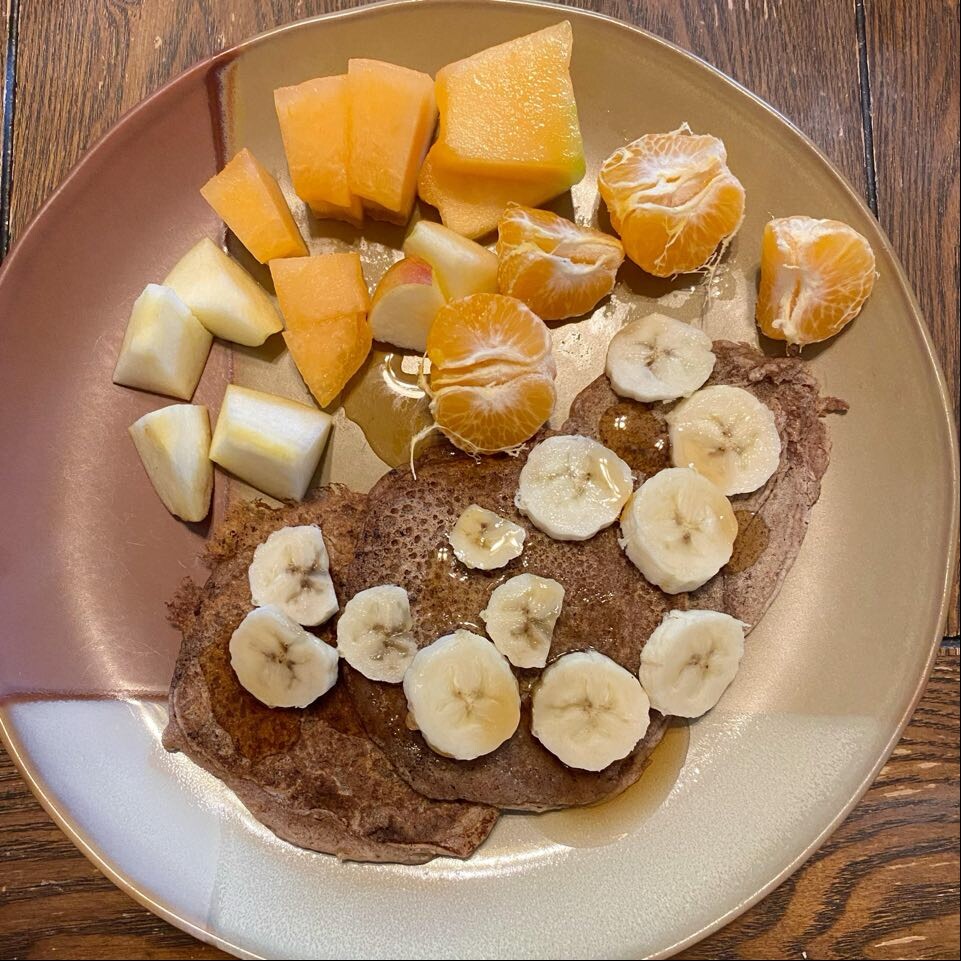
Ingredients
- 1 cup gluten-free 1 for 1 flour
- 1 Tbs ground flaxseed (flax meal)
- 2 tsp baking powder
- 2 tsp ground cinnamon
- 1/4 tsp himalayan salt (or sea salt)
- 2 Tbs pure maple syrup (can also use honey)
- 1 tsp vanilla
- 1/4 cup buttermilk (see note)
- 1 cup almond milk
Instructions
- Grease griddle and preheat (see notes for suggestion).
- In mixing bowl, combine flour, flax meal, baking powder, cinnamon, and salt. You can sift if you want it more fine. I skip this step because it seems to work fine to just mix it.
- In another bowl, combine maple syrup, vanilla, buttermilk (see note), and almond milk. Slowly mix in half of the liquid into the dry ingredients. Stir continually as you add the rest, 1/4 cup at a time. This helps keep it from being too runny. Mix until all the lumps are out of the batter.
- Place about 1/4 cup of mix onto prepared hot griddle.
- Cook for 1-2 minutes, or until they start to bubble around the edges. Flip and cook the other side for an additional 1-2 minutes. Remove and serve.
If you’re walking this same journey of homemaking, decluttering, and creating a peaceful, faith-filled home, you’re not alone.
I’d love to share encouragement, simple living inspiration, and homestead wisdom with you — right to your inbox.
