In order to save time and money, I like to buy foods in bulk. One of the items I like to buy in bulk is rice. I usually get it from Sams in either a 25 or 50 pound bag. Before I go any further, let me state that I have not done the proper research to know exactly which rice is the healthiest and best for my family. For now, this is just a budget-friendly option that I choose.
As you can imagine, this large of a bag takes my family a few months to go through (we use a lot of rice!). I usually bag it into gallon size bags and freeze it until I'm ready to use it. This time I decided to use my air-tight sealer and some half-gallon jars I had on hand. I kept one jar open for use and sealed another 7 jars. I dated the top and will store these in my pantry.
Again, I haven't done a ton of research on this option. I have seen that you can just simply seal them without any oxygen absorbers. This should keep the bugs and pests out and also help it remain fresh. However, for super long-term storage (like 10+ years), I think I'd prefer to add the oxygen absorbers for that extra bit of preservation.
Here are the supplies I used (other than the rice):
Vacuum Sealer - this is just a generic link. My sealer is so old it is no longer available. It is a Black & Decker brand. Just be sure the sealer you use has an way to hook up an external hose for jar sealing.
Oxygen Absorbers (optional)
There really isn't much to it. Just fill the jars with a little bit of head space. Attach the hose to the sealer, put the lid onto the jar, place the sealer firmly on top, and hit the seal button. Once the seal is completed, I have found it best to disconnect the hose first, then remove the top (what fits over the lid) off of the jar. Otherwise, the top seems to want to undo the seal and take the lid with it. This doesn't happen every time, but when I remove the hose first, it almost never happens.
Then, just remember to store the jars in a cool, dark place.
This post is where I got my information for getting started. It states to either air-tight seal or use the oxygen absorbers. It also gives tips on proper storage.
Happy Storing!
🌸 From my homestead heart to yours —
If you’re walking this same journey of homemaking, decluttering, and creating a peaceful, faith-filled home, you’re not alone.
I’d love to share encouragement, simple living inspiration, and homestead wisdom with you — right to your inbox.
If you’re walking this same journey of homemaking, decluttering, and creating a peaceful, faith-filled home, you’re not alone.
I’d love to share encouragement, simple living inspiration, and homestead wisdom with you — right to your inbox.
– Amanda | The HomeGrown Mom 🌾

Canning at home can seem like a daunting task, especially if you've never done it before or didn't grow up in a household where canning was a regular activity. The process requires a bit of courage and the right equipment to start preserving your own foods safely and effectively. From personal experience, the journey to mastering home canning can stem from necessity, such as the need to control dietary restrictions, and morph into a rewarding hobby that offers both satisfaction and a plethora of homemade goods.
To begin canning, certain tools are indispensable. These include a quality canner that can accommodate both water bath and pressure canning methods, canning jars along with new lids and rings, essential canning tools like a funnel, jar lifter, and bubble remover, and labels to ensure everything is clearly marked with contents and date processed. It's essential to ensure that jars are free from nicks or cracks and that lids have an intact seal to ensure the safety and longevity of the canned goods.
Lastly, proper storage and adherence to approved canning recipes are crucial to the success and safety of your canning endeavors. Canned goods should be kept in a dark, cool place like a pantry, and older items should be used first to maintain freshness. By utilizing only approved and tested recipes, you safeguard against the potential risks of foodborne illnesses, ensuring that your home-canned foods are not only delicious but safe to consume. This beginning guide underscores the importance of preparation, quality supplies, and following safety guidelines to embark on your own canning journey.
Read more...
Fall is one of my favorite times of the year. I love the falling leaves and their vibrant colors. I also like the idea of being nice and cozy in a warm blanket, cuddled up with a good book or doing come crochet while enjoying a hot cup of coffee. I finally found a way to bring my love of fall all together in one place. What's better than a custom designed coffee mug with a cozy looking mug rug to go with it?
My family and I recently started designing and printing mugs. My husband and daughter are both amazing artists. Couple that with our love of mugs and voila! You have a mug printing business that brings it all together. You can see our designs here. If you don't see what you are after, feel free to send us a message. We are always up for new ideas!
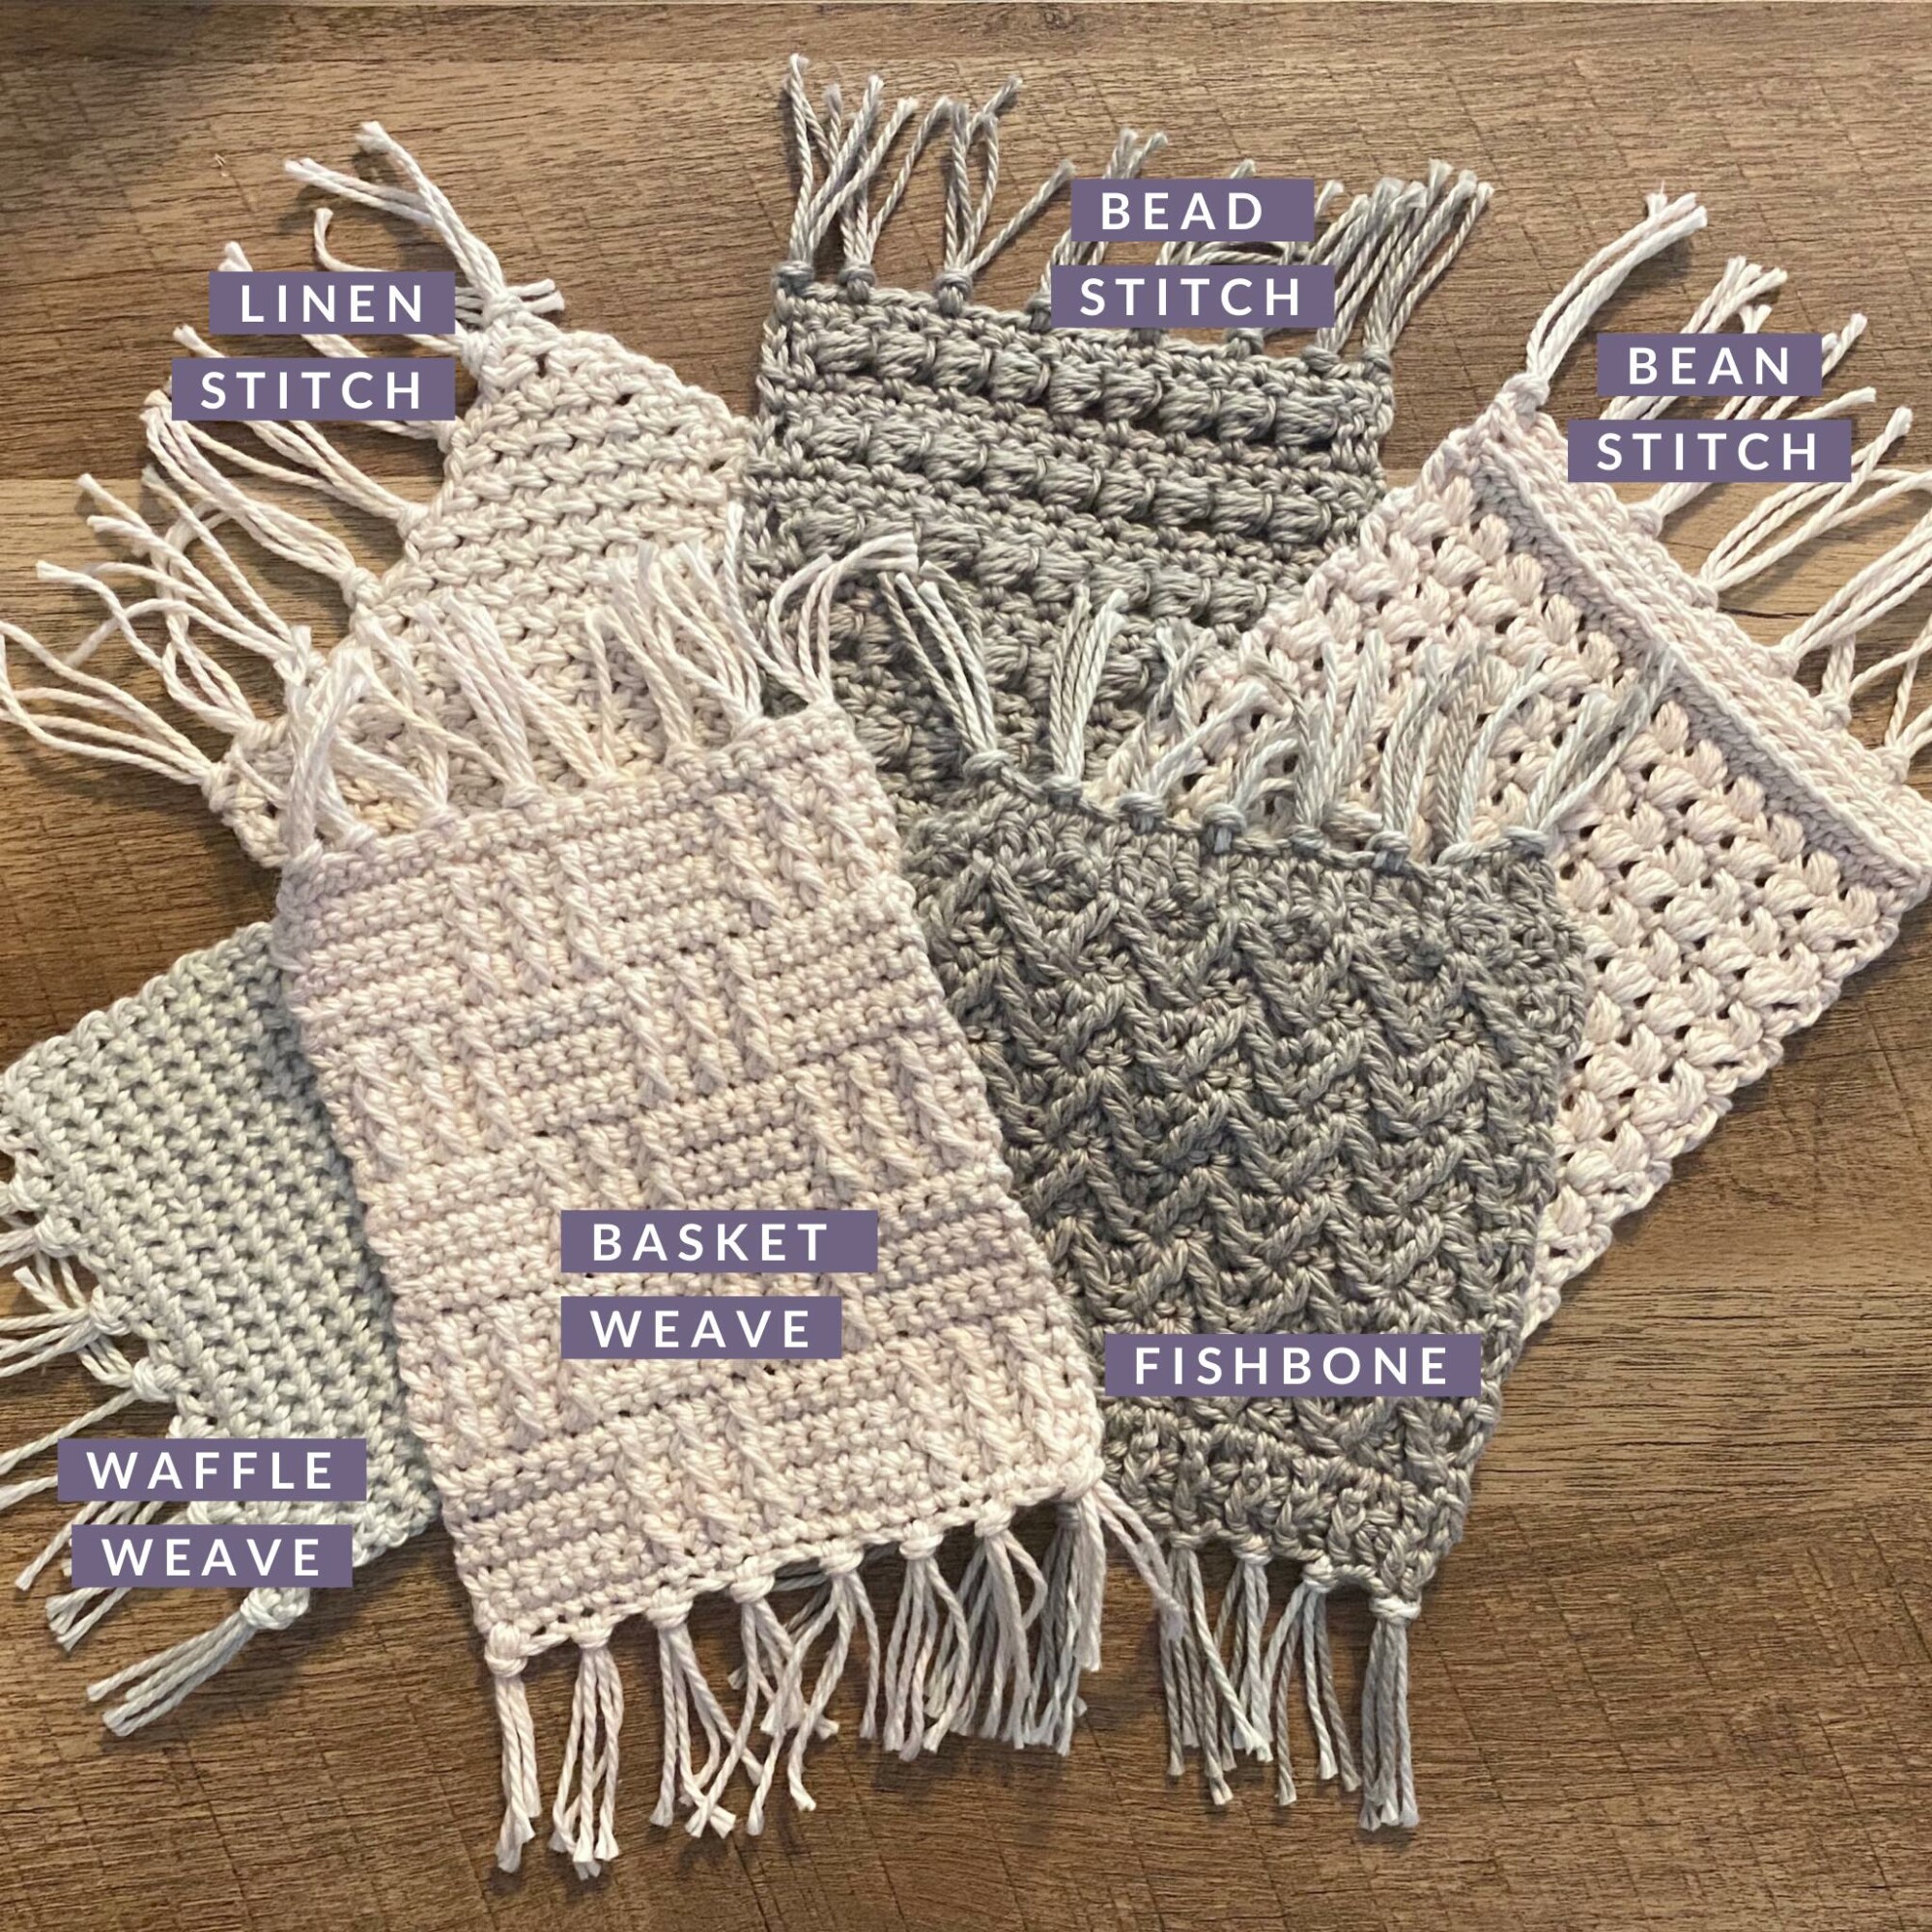
With Christmas just around the corner, I wanted to create mug packages for gift sets. I came across these adorable mug rugs from Annie's Craft Store and just had to give them a try! These Rustic Mug Rugs make the perfect addition to any mug gift set. Don't you agree?
I decided to make a sample of each of the 6 patterns. I sized them down by using a smaller hook size and a weight 3 cotton yarn because I wanted a smaller size to go with my package. The finished size of these is roughly 4 1/2 inches wide and 5 1/2 inches long, excluding the fringe. I also cut the fringe about 1 inch shorter to compensate for the smaller size of the rug. 

They are super soft, very flexible, and have such a nice texture. I love all of the variety! If you are looking for a unique gift for a loved one this holiday season or enjoy a little treat for yourself, please visit our online shop and choose your package.
Be sure you stop by my YouTube channel to get a closer look at our Winter Spice Mug Set!
🌸 From my homestead heart to yours —
If you’re walking this same journey of homemaking, decluttering, and creating a peaceful, faith-filled home, you’re not alone.
I’d love to share encouragement, simple living inspiration, and homestead wisdom with you — right to your inbox.
If you’re walking this same journey of homemaking, decluttering, and creating a peaceful, faith-filled home, you’re not alone.
I’d love to share encouragement, simple living inspiration, and homestead wisdom with you — right to your inbox.
– Amanda | The HomeGrown Mom 🌾
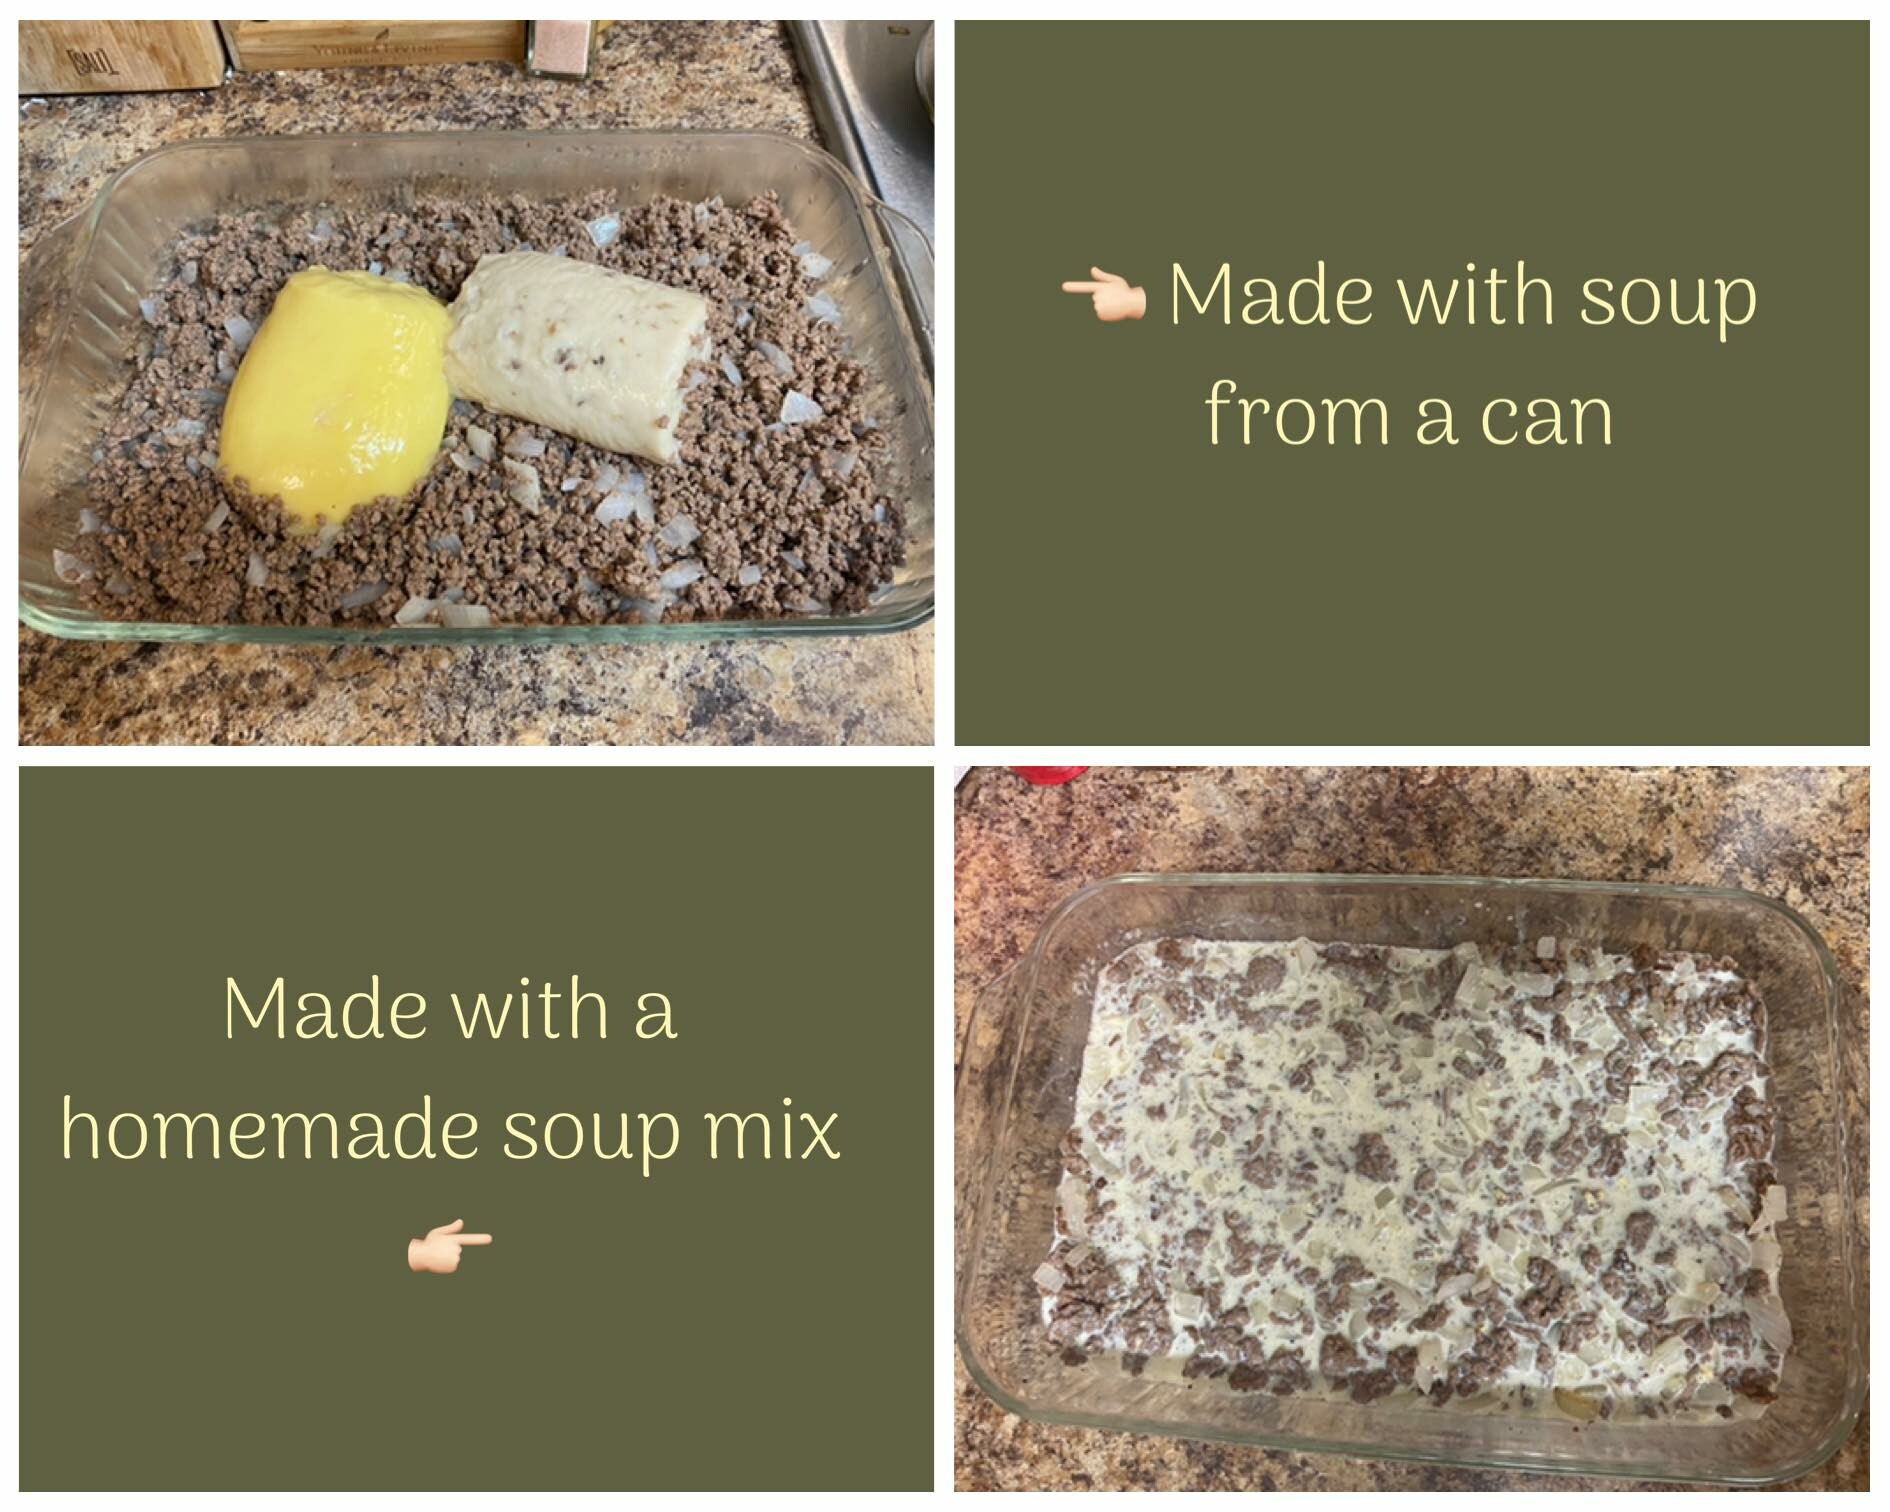
I love using soup mixes in my recipes, but I don't love all the added yuck! In my family of 5, 3 of us have special dietary needs. No, they aren't all the same. So, if I truly make something that we can all enjoy, boxed, canned, pre-made foods are definitely not the place to go. Not to mention that once you get used to cooking a certain way, the canned/boxed/pre-made stuff just doesn't seem as appetizing. You can see the difference in this post where I compare pictures of canned vs homemade soup mix. Wow! Just look at the difference! Now, tell me which one you would choose.
That's why I was super excited to find a way to make my own. Here's the recipe I currently use. Eventually, I plan to find a fully dairy free version to better suit my family's needs.
Since we are mostly dairy free, when I mix this up I use almond milk. Even though there is powdered milk in this recipe, it seems to be mild enough that we can still tolerate it.
DIY Soup Mix
Ingredients
- 2 cup powdered milk
- 3/4 cup cornstarch
- 2 Tbs chicken bouillon (see notes)
- 1 tsp onion powder
- 1/2 tsp thyme
- 1/2 tsp parsley
- 1/2 tsp basil
- 1/2 tsp black pepper
Instructions
Measure ingredients and place in glass container.
Shake well to combine.
Store in cool dark place in airtight container.
To use: Mix equal parts of soup mix and preferred liquid (almond milk, water). Heat over medium heat in saucepan, whisking continually. Bring to a boil and cook for 2 minutes.
To use as a thickener, combine 1/3 mix with 1/4 liquid and add to desired recipe.
Note:
Find the recipe I use for bouillon here.
Like what you see in this blog? Join my free group for even more great content!
🌸 From my homestead heart to yours —
If you’re walking this same journey of homemaking, decluttering, and creating a peaceful, faith-filled home, you’re not alone.
I’d love to share encouragement, simple living inspiration, and homestead wisdom with you — right to your inbox.
If you’re walking this same journey of homemaking, decluttering, and creating a peaceful, faith-filled home, you’re not alone.
I’d love to share encouragement, simple living inspiration, and homestead wisdom with you — right to your inbox.
– Amanda | The HomeGrown Mom 🌾

On Friday mornings I make meals for shut-ins, elderly, or those recovering from a medical procedure. I have a list of meals I choose from. Most of them are meals my family used to enjoy. However, our diets have changed so much that I end up making a totally different version of the meal for my family. It's amazing the differences I now see in foods. Food that I once considered home-made from scratch, I now laugh at because I know the difference. Here's an example:
The first picture is using canned soup mix. The second picture shows the same recipe, but made with a homemade soup mix, totally from scratch using dried herbs, seasonings, and almond milk.

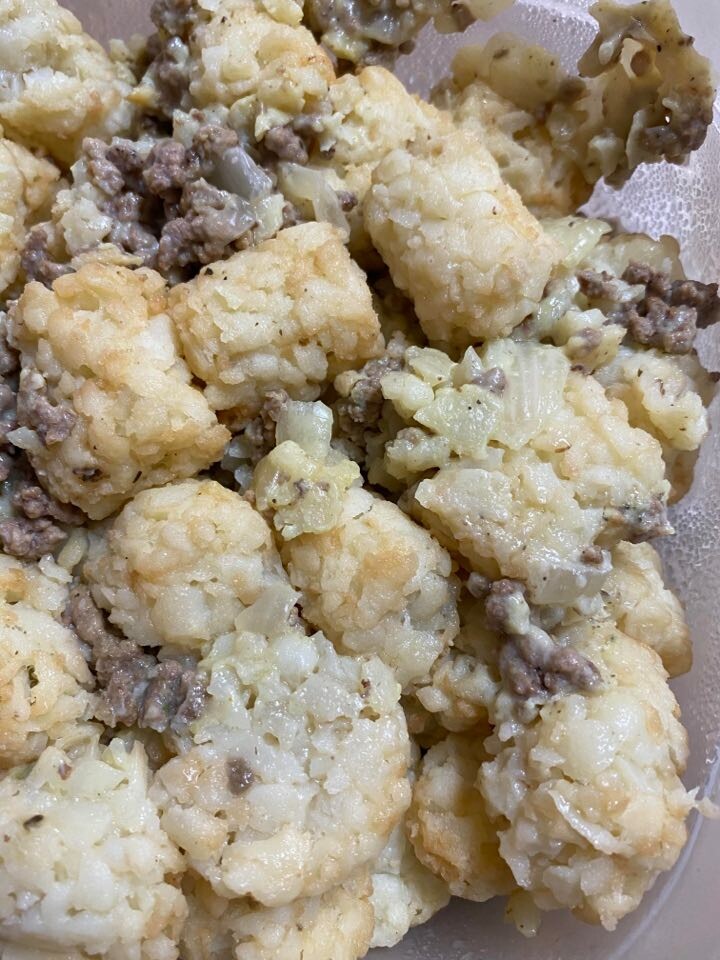
Now for the good part! Below, I will share with you the recipe I make for my family. Enjoy!
Tater Tot Casserole

Ingredients
- 1 lb ground hamburger meat
- 1/2 medium onion, chopped
- 1/3 cup DIY soup mix (see notes below)
- 1/4 cup almond milk (or water)
- 32 oz frozen tater tots
- salt & pepper to taste
Instructions
- Preheat oven to 375 degrees.
- Brown ground beef, season with salt and pepper.
- Add chopped onion, cook until tender.
- Meanwhile, mix soup mix with almond milk and set aside.
- In a 9x13 casserole dish, combine ground beef mixture and soup mix.
- Top mixture with tater tots.
- Bake, uncovered, for 30-40 minutes, until bubbly and tater tots are golden brown.
Note: If you are not dairy free, you can add cheese to the top and return to the oven to melt it.
You can find the soup mix recipe here.
🌸 From my homestead heart to yours —
If you’re walking this same journey of homemaking, decluttering, and creating a peaceful, faith-filled home, you’re not alone.
I’d love to share encouragement, simple living inspiration, and homestead wisdom with you — right to your inbox.
If you’re walking this same journey of homemaking, decluttering, and creating a peaceful, faith-filled home, you’re not alone.
I’d love to share encouragement, simple living inspiration, and homestead wisdom with you — right to your inbox.
– Amanda | The HomeGrown Mom 🌾


